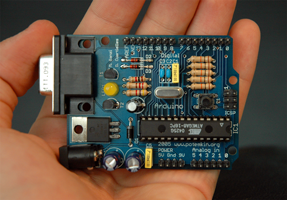
The “hello World” for Arduino is the Sketch “Blink” which turns an LED on and off forever.
Now, let’s put a sensor in the equation. For example, we want to turn the LED on when the baby’s room temperature is over 30 degrees.
Now, let’s put a sensor in the equation. For example, we want to turn the LED on when the baby’s room temperature is over 30 degrees.
We can use a Wifi or Bluetooth Low energy (BLE) shield with two Aurdinos (one connected to the sensor, the other to the LED) Of course we will need a computer to coordinate between the two.
Both of these Aurdino need to be connected to a source of power (outlet in the wall, big battery, etc.) as wifi and the out of box Aurdino UNO is rather power-hungry. Assuming that power is not readily available we can use the innovation from our friend at RFduino which combines the simplicity of Arduino with BLE (blue tooth low energy). Now we have a great solution but we still need the computer to coordinate between the two as each RFduino is a slave can only talk to the master (the computer).

The master has to work overtime as it is getting data from all the 5 sensors while controlling the 10. If 2 sensors want to spend data at the same time now we are getting in even more complicated code on the master side as it needs to handle two simultaneous BLE channels. Good luck finding devices that can handle that! Simply put :it would be like trying to connect two WiFi networks to your CPU or your phone at the same time? It’s possible and can be done using different outlets, but it will require more resources and crazy complicated code.
So, if we take a step back and look at all this, we see that what we have right now is a mesh and BLE is not designed to handle mesh networks. That’s what ZigBee is good for. So now, flush your box-full of RFduinos, buy a new box full of ZigBee shields for Arduino and start all over again.
But what if we want to measure temperature in 5 different rooms and control 10 LEDs in the 10 other locations. We can use Rfduino, but we need to make sure that they are all within 10 feet of the Master. If any of them happens to be beyond 10 feet (aka I have a bigger house than yours): no worries, you can set yet another computer, write complicated code for the 2 masters to coordinate together over wifi and get your system to work.
Otherwise, instead of bending over backwards trying to force these technologies to adapt to you, why not deal with a much smarter, cost-efficient solution that is designed to adapt to your needs instead of the other way around?
With it, each Aurbee can control the LEDs on any other Aurbee with a simple three line code, you will be able to accomplish in a hearth beat, what other technologies would require hours and complex efforts. No need to worry about routing, zigbee stack details, MAC address or anything.
Remember how we started with simplicity and got lost along the way with layers and layers and power-hungry limitations? Well, with AurBee, we are back to the essence of Arduino, where you don’t need to deal with all the fuss and focus on your innovation. Just easy, breezy, beautiful plug and play!
Power requirements:
-2.8 to 5.7 Volts
-26 mA (at full power)
-10 uA (sleep mode)
-Can be USB powered using USB programming shield
Flash Memory:
-256 Kb (192 Kb available after Aurbee stack)
-192 Mb/sec Bandwidth
-256 bytes Cache
Ram: 64 Kb (52 Kb available after Aurbee stack)
EEPROM: 2 Kb
Direct Memory Access: 16 channels
Digital I/O:
-34 pins
-Output: 3.3 Volts
-Input : 5 Volt Tolerance
Analog Input:
-21 pins
-2 converters with 16-bit resolution (13-bit usable)
-2 Progressive Gain Amp
-12 touch sensing pins
-3 Comparators
Timers:
-12 total
-3 FTM with 12 PWM output pins
-1 PDB
-1 CMT (infrared)
-1 LPTMR
-4 PIT (interval)
-1 Systick
-RTC (date/time) requires a 32.768 kHz crystal & 3Vbattery.
Communication:
-1 USB
-3 Serial ports with 2 FIFOs,3 High Res Baud,2 Fast clocks
-1 SPI with 1 FIFO
-2 I2Cs
-1 CAN Bus
-I2S Audio 8 FIFO